Bonus Days! Earn in July. Redeem in August

BONUS DAYS!  JULY 7-31.  EARN IN JULY.  REDEEM IN AUGUST!

  • For every $50 (on a single order, price before shipping and tax) you spend between July 7 – 31,  you’ll earn a $5.00 Bonus Days coupon that you can redeem between August 2 – 31, 2016.

  • An email address is required to participate in this promotion; Bonus Days coupon codes can only be delivered via email.

  • IMPORTANT!  Save both the email containing your Bonus Days coupon codes AND write down the coupon codes in a safe place. Codes cannot be re-sent if the email is lost, and lost codes cannot be recovered.

    • Bonus Days coupon codes can be redeemed for any product, excluding Starter Kits and Paper Pumpkin subscriptions. New prepaid Paper Pumpkin codes can be redeemed.

    • There is no limit to the number of coupons you can receive per order or throughout the duration of the promotion. There is no limit on the number of coupons you can use on an order during redemption.

Online Exclusive Iconic Celebrations


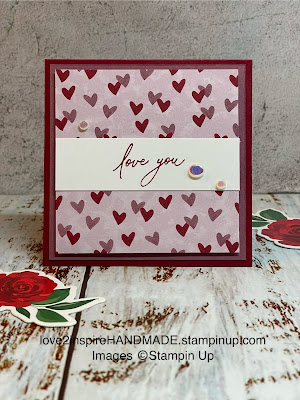
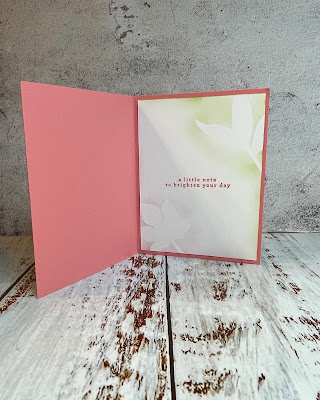
Created this card using the Iconic Celebrations designer series paper, applying distressed edges and fussy-cutting techniques to achieve a multi dimensional effect. 


Iconic Celebrations

This week, I will be sharing the 6"X6" Designer Series paper "Iconic Celebrations" 
and Everyday Greetings" stamp set sentiments.

This paper offers a diverse selection of designs, ideal for various creative projects. 


Changing Leaves

This project showcases the potential `of the Changing Leaves dies and embossing folder in producing colorful designs. 
Using blending brushes and masking techniques to highlight
their capabilities in a simple design. 


Find products here:


I love how this card turned out!


Quilt Patch Card

During our recent Team Mystery Tuesday session, I demonstrated a technique for creating a quilt card using a few scraps of designer series paper to create a quilt pattern. 


Keep reading to see how you can create your own. 


Measurements:
Cardstock base: 5-1/2" X 11"
(X2) Cardstock: 5-1/4" X 4" one is for inside of card and the other is for out side where 
you will apply your strips. 
3/4" strips of randomly selected Designer Series Papers

Other Supplies:
Liquid glue or adhesive sheet
I found the adhesive sheet works the best.
dimensions (optional)
Embellishments (optional)
Stamp sentiment 
Scrap for sentiment
Scissors

I started with 3/4" strips and added adhesive with an adhesive. You can also use Adhesive Sheets. It works well for this. Add your strips in whatever random direction you desire. I did mine about 3/4 slanted one way and continue adding in other directions till front was full. Flip over and trim off the overhang strips. Using dimensions attach to front. Add sentiment. 


Bonus Days

Take advantage of Bonus Days! This one-of-a-kind Stampin’ Up! Promotion provides a fund shopping experience. 

How does it work? 
With every qualifying purchase ($50.00) 
spent from July 3-31, 
You will receive a $5.00 coupon that
 can be redeemed on a purchase in August. 
There is no limit to the number of codes you can earn in 
July and redeem in August. 
ALL coupons will be emailed to you. 
(Note: The qualifying amount is calculated before shipping and tax.)

This is a great time to stock up on regular supplies or make special purchases that you may have been holding back on. 


Changing Leaves Online Exclusive

EEEK... Shop Changing Leaves to get your creative juices working for the fall season coming soon.

I can't wait to play with this stamp set, this 
entire bundle is going to be a favorite. Not to mention 
this embossing folder is amazing. 


Playful Ghosts Online Exclusive


This adorable stamp set has been a lot of fun to play with this week, 
and as you can see the
 ideas just keep coming and can be done up in so many fun ways. 


Independence Day

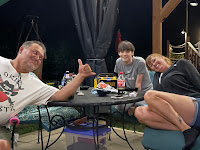
My favorite time spent is with family on the holidays, especially if we don't get to see each other but once a year.  It has been a tradition for us for several years now. My brother and his family put on quite the show. 

It's the little things and time spent together that mean the most. 

Our little circle.  💕


All these littles make our heart BIG!


Thankful always to celebrate in our great nation. 


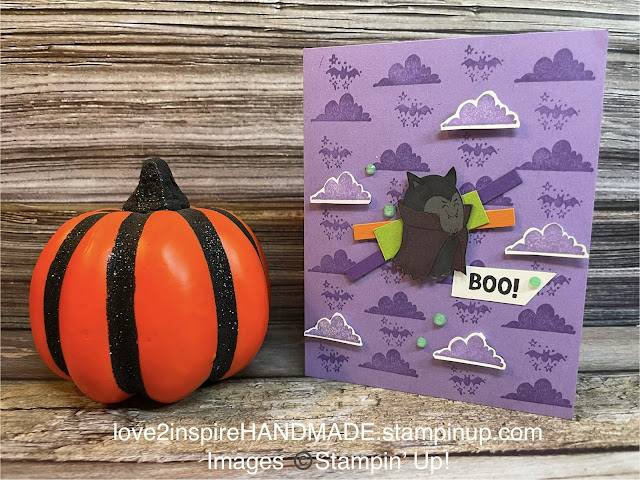
Online Exclusive "Playful Ghosts"

Design an attention-grabbing card using the
Playful Ghosts cling stamp. 
With clean details. Building an imaginative and 
fun background to complement the overall aesthetic. 


 Supplies Used: 

Cardstock:

Highland Heather # 146986

Scraps: Basic White, Granny Apple Green , Pumpkin Pie, Blackberry Bliss, Basic Grey 

Embellishments:

2024-2026 In Color shimmer Gems # 163781

Blend Markers:

Basic Black # 154843

Blackberry Bliss # 154877

Ink: 

Memento Tuxedo Black # 132708

Blackberry Bliss # 147092

Tools:

Paper Trimmer # 152392

Scissor Snips # 103579

Multipurpose glue # 110755

Mini Dimensions # 144138

Masking Technique with Playful Ghosts

Masking techniques with stamps can be used to create layers and 
create images in the foreground or background. 
Creating depth with a single stamp is so easy. 
Stamp image onto cardstock and stamp a second image on scrap paper and
 fussy cut out and lay on top of main image. 
Now you are able to take desired stamp to stamp around
 image to create a fuller look without messing up your center image. This can also be done by washi tape or post note. 


To create the fun stripes on base of card. I used a scrap sheet of cardstock 
and made stripes along the card giving a plaid look. 
Then used a flick technique by splattering ink from my blend marker.
Simply by scrapping the tip of marker across lid, 
allowing ink to splatter out onto cardstock.


Playful Ghosts Small Treat Box

I always get excited when Stampin' Up! downloads NEW 
Online Exclusives items to our online store. 
These adorable little ghosts will put a smile on with every BOO!


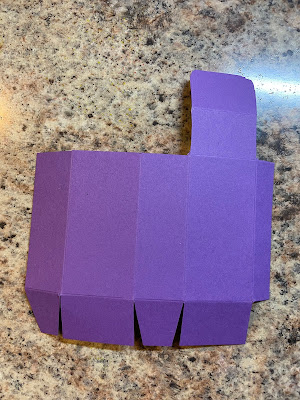
Step ONE: Colored Cardstock: 6" X 5-1/2" score 6" side at 1", 4", and 5" turn and score the 5-1/2" side at 1", 2-1/2", 3-1/2" and 5"


Step TWO: Trim the 1-1/2" end by cutting the small 1/2" corner off completely. and trimming up to score line down the roll. Cutting a wedge on the two 1" slits. 

On the opposite end cut off all ends up to score line. Leaving the one closest to the 1/2" side. I used an corner punch to round the top.

See picture below. 

Step THREE: Fold and assemble box using your favorite adhesive. It now should look like the picture shown below. 


Measures 3" X 1-1/2"
Decorate as desired!

Supplies Used: 
Playful Ghosts Cling stamp set
Granny Apple Green Cardstock #146990
Pumpkin Pie Cardstock #105117
Blackberry Bliss Cardstock #133675
Dark Basic Black Blends #154843
Blackberry Bliss Blends #154877
Pumpkin Pie Blends #154897
Granny Apple Green Blends #154885
MultiPurpose Glue #110755
Black & Very Vanilla Ribbon # 161982


Coffee & Cards