Fancy Fun Fold Easel Fan Card - "On the Go DSP"


It folds. It stands. It wows. 😍
Creating this fan fold easel card was so much fun—and way easier than it looks! I love how it combines dimension and function in such a unique way. Whether you’re sending a thoughtful note or just showing off your card-making skills, this one’s a total standout.


Check out the video below for all the details. 


Measurements:
1. Card Base 9" X 6" Score 3" and 6" and diagonally (see video for more detail)
2. Coordinating DSP 5-3/4" X 2-3/4" 
3. Diagonal lines are mountain folds. Straight lines are valley folds.
4. Press glued area down to form easel base.
5. To create fan cut a 12" X 4" piece of DSP. Score paper 1/4" spaces all the way down. 
Make nice crispy pleats. Optional use a decorative punch or die to give extra flare. 
6. Embellish as desired. 
7. Add greeting to bottom using 2-3/4" X 5-3/4"

Fancy Boarder Dies # 165380
On The Go DSP # 165566


Bright Colors - Impressions Abloom


Ending the week on a bright note!
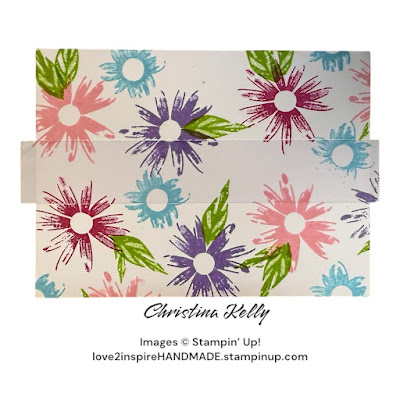
Here’s my final card showcasing the Impressions Abloom bundle—and I might’ve saved the boldest for last! I used Coastal Cabana and Strawberry Slush for the flowers, accented with Granny Apple Green card stock layered against the Coastal Cabana card stock to create a vibrant, happy color combo that just feels like appreciation in card form.
Perfect for letting someone know, “I appreciate you.” Because a little color and kindness goes a long way!

🌸 Shop 24/7 

Adventure Time Scrapbooking class!


Love to scrapbook? Join us July for the next bi-monthly class. Beginners or seasoned it’s a fun time for all


Our next class is Saturday, July 26, 2025. 
Meeting at the Honey Hole, in Marshall, TX. 
If you are interested in joining drop a comment below and I will get you all the information or email me for more details. 


Bold Blooms + Bright Colors using Impressions Abloom


Bold blooms + bright colors = instant smile
How fun is this card using the Impressions Abloom stamp and die set? I went bold with layered florals in bright Strawberry Slush CS, Coastal Cabana CS, and Daffodil Delight CS against a crisp black band—it really makes the flowers pop! The stitched square sentiment adds a clean, classic finish that ties it all together for the perfect “Thinking of You” card.
This one is bursting with dimension, texture, and just the right amount of color to brighten anyone’s day!
Would you try this color combo? Drop a 💛 if this card made you smile!
# 165611 Impressions Abloom Bundle


Impressions Abloom


Proof that simple can still be stunning! 🌼
Creating with the Impressions Abloom stamp set and keeping it clean, bright, and simple. I love how just a few bold colors —make this thank-you card pop with cheerful energy! A bit of twine and a circle tag give it that handmade charm without overcomplicating things.
The matching envelope is the cherry on top—because happy mail should start before they even open it!


Impressions Abloom - Bold & Bright


Bold blooms and bright colors? Yes, please! 🌸
Purpose to show off this cheerful thank-you card created using the "Impressions Abloom stamp bundle" and coordinating dies. The textured black embossed background makes those playful florals pop in bright shades of Daffodil Delight, Strawberry Slush, Coastal Cabana, and Granny Apple Green ink. Each flower is die-cut and layered for extra dimension, and a bit of linen thread adds a rustic touch.
The matching envelope ties it all together with stamped corner blooms, making the whole project feel polished and personal.

You can CASE this creation using supplies below.

Supplies Used:

Basic White CS 

Basic Black CS

Impressions Abloom Bundle

Daffodil Delight Ink

Strawberry Slush Ink

Coastal Cabana Ink

Forever Plaid 3D Emboss Folder

Stampin' Cut & Emboss Machine

Tips & Tricks: Masking Technique with Impressions Abloom


The Tips & Tricks: Masking Technique
Want a clean, crisp border without the fuss?
Let’s talk masking magic!
When it comes to masking paper in crafting, there are tons of creative ways to use it—but here’s one of my favorite simple tricks using Stampin’ Up! Masking Sheets: Shop Masking Sheets:


1️⃣ Mask off the center of your card
2️⃣ Stamp your images all around the masked area
3️⃣ Peel off the masking sheet and—ta-da!—you’ve got a seamless, crisp border ready for your sentiment
4️⃣ Stamp your greeting right in the center for a polished, professional finish

So easy. So satisfying. So fun.
Have you tried masking before? Drop a comments.


Sketch Challenge: Floral Impressions DSP


Today’s sketch challenge came straight from the Stampin’ Up! Annual Catalog with tons of sketches to capture your own take on a card creations—proof that inspiration is literally right at our fingertips! I paired it with the gorgeous Floral Impressions DSP to give it a bright, vibrant twist. It’s amazing how a simple layout and beautiful paper can come together to create something so eye-catching.

Supplies Used:
Early Espresso CS # 119676
Floral Impressions # 165603
Daffodil Delight CS # 119683
Basic White CS # 166780


Impressions Abloom DSP - Fan Card


This week on YouTube, I’m showing you how to create a fun and flirty fan card using the stunning Impressions Abloom DSP. This project is bursting with color, texture, and that extra wow factor—perfect for anyone who loves a pretty paper moment! This card measure 5" X 7"


Measurements:
Base: 10" X 7" Score @ 5" at top using a pencil measure in 2". Cut from pencil mark down to bottom right corner. 
Matt ((same CS as Base)) 6" X 4" cut diagonal top left to bottom right.
2nd Matt (( coordinating color)) 
* 6-3/4" X 4-3/4" - measure using pencil; mark on top edge at 2-3/4" cut down to bottom right corner. With small piece that was trimmed off cut off 1/4" 

* 5-1/2" X 3-1/2" - cut diagonal from top left corner to bottom right. ((Note start in middle to cut from top to bottom)) Only need one piece of this. Use right side. ))

* DSP: 6-1/2" X 4-1/2" - Pencil mark from left edge 2-1/2"  and cut down to bottom right corner. The small piece trimmed off cut 1/2" off the outer side. 

* 5" X 3" - Cut diagonal from top left to bottom right. 

* 6-3/4" X 1" - for inside of card. 

* Basic White CS - 6-3/4" X 4-3/4" ((inside of card))

Watch the video for full tutorial. If you enjoyed this tutorial please subscribe to my channel and ring the bell so you never miss a tutorial. 


She believed she could..and she did!


I love how this card turned out... used the Caps & Gown stamp and added my own doodles for back matt. I had to go a little extra for my sweet niece. It's a big deal when our little walk across the stage. 

She believed she could... and she did!
🎓
Happy Graduation Day to my beautiful niece! We are bursting with pride as we celebrate this incredible milestone with you. Wishing you all the absolute best this world has to offer—you deserve it all and more. Your uncle and I are so very proud of you and can't wait to see all the amazing things you’ll accomplish!
Show her some love in the comments as she steps into her next big adventure!


Cap & Gown cards


With Graduation around the corner, decided to create some inspiration for you with this amazing Cap & Gown stamp set. 
So many fun and wonderful creative ideas. 


Hard work + dedication = dreams coming true!
🎓
So much hard work, late nights, and perseverance have
led to this incredible moment.


Congratulations to all the graduates this week—you should be so proud of all you’ve accomplished. Wishing you nothing but success and happiness in this next exciting chapter!


Why pay full price when you can get it ALL for less?

Why pay full price when you can get it ALL for less?

If you’ve been eyeing that wish list and loving Stampin’ Up! products, May is your moment. For this month only, you can grab $165 worth of anything you want—yep, anything!—for just $99 + tax. And guess what? Shipping is FREE.

We’ve got a brand-new catalog, bursting with fresh colors, exciting products, and allll the scrapbooking supplies. And when you join, you’re not just getting a discount—you’re joining my Inspired Bees community: a creative, supportive, and fun space filled with crafters who get you. And did I mention being part of my team you can attend monthly card class for free. Plus other perks along the way.

Curious? Let’s chat! 

JOIN MY TEAM


Virtual Album Retreat; July 16-18


I'm excited to indroduce the Stampin' Up! Virtual Album Retreat. a unique three day online crafting event taking place from July 16-18, 2025. This retreat offers an opportunity to create 12 beautifully designed scrapbook spreads (24 pages total) using the exclusive Month by Month Album Retreat 2025 kit. 

Event Highlights:
+ Dates & Time: July 16-18, 2025 2:00PM-10:30PM (MT) each day
+ Location: Private Facebook Group
+ Access: Purchase of the Month by Month Album Retreat 2025 kit ($250 USD) grants access to the event. 
+ Kit Availability: Orders open on May 28th, 2025
+ Langue: English

Replays: Recorded sessions will be available in the FAcebook group for later viewing.

What's Included in the Kit: 
+ Exclusive stamp sets and die cuts
+ Precut Designer Series Paper and Two - Tone Cardstock 
+ Embellishments
+ Memory Protectors and Flip Flaps
+ Photo placeholders
Note: The kit does not include an album. You may use an existing album or conside purchasing a 12" X 12" album separately. 

This retreat is more than just crafting; it's an opportunity to learn new techniques, connect with fellow crafters and Stampin' Up!  staff, and enjoy fun giveaways. Whether you're a seasoned scrapbooker or new to the hobby, this event is designed to inspire and engage. 
For more details and to order your kit starting Wednesday, May 28th. Please visit my Stampin' Up! Website
 You will need additional supplies to complete the pages. 
+ Ink: Cherry Cobbler # 147083, Darling Duckling # 165277, Garden Green # 147089, Lost Lagoon # 161678, Misty Moonlight # 153118, Mossy Meadow # 147111, Pecan PIe # 161665, Pumpkin PIe # 147086, Soft Sea Foam # 147086, Stampin Journaling Pen # 166647, tuxedo Black Memento Ink Pad # 132708
+Coloring Tools: Blending Brushes #153611
+ Adhesives: Foam Adhesive STrips # 141825, Multipurpose Liquid Glue #110755, Stampin' Dimensionals #104430, Stampin' Seal #152813
+ Tools: Bone Folder #102300, Clear Block B #117147, Clear Block D #118485, Clear Block H #118490, Paper Snips Scissors # 103579, Paper Trimmer # 152392, Stampn' Pierce Mat #126199 or sturdy cardboard
+Other: Eraser, Masking tape or sticky notes, pencil, ruler, scratch paper, stamp cleaning supplies, 1" Circle punch or die, 1/4" or 1/2' circle punch or die. 

Sketch Challenge: Graduation vibes in full swing.


Graduation vibes in full swing!
🎓
Today’s sketch features this awesome tag layout that worked perfectly to create a “Way to Go, Grad!” tag. It’s just the right mix of simple and celebratory—and fits so well with this week’s graduation theme! Love how a great sketch can help bring the message to life.
Feeling inspired? Try your own take on this sketch and tag me on FB —I’d love to see what you create to celebrate
the grads in your life!


I used scrap pieces creating this tag. Different sized circle punches, shimmer paper, and ribbon.


Creating a simple Kleenex Wrap

Because even the little things can make a big impact.
Creating a simple Kleenex wrap has never been easier! Whether it’s for a little pick-me-up, a get-well-soon gift, or just a sweet way to say you care, these wraps are a quick, thoughtful project that adds a personal touch to any occasion. Plus, they’re a great way to use up those beautiful paper scraps!


Watch full Tutorial Here: 


Measurements: 

DSP: 4-1/4" X 8-1/2" Score @ 3/4", 3", 3-3/4" 6-1/2", and 7"

You may need to adjust measurements to fit other brand tissues)

Stamp greeting on large label. 

Wrap Twine around/through the bottom and tie

Attach sentiment using dimensional along with any embellishment you desire. 


Coffee & Cards